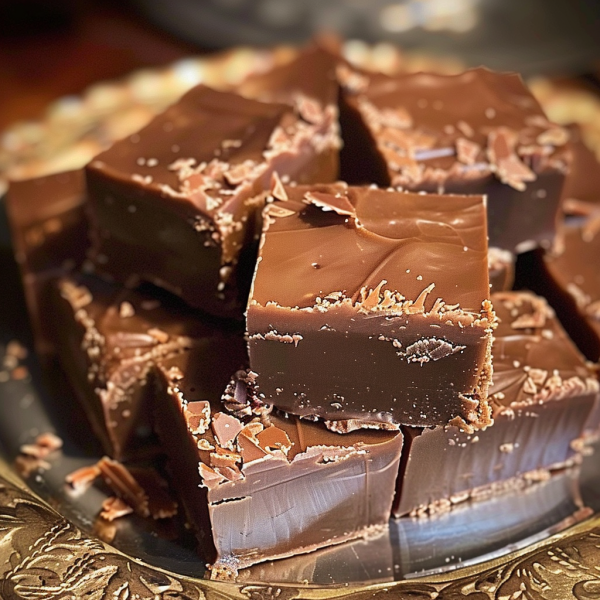
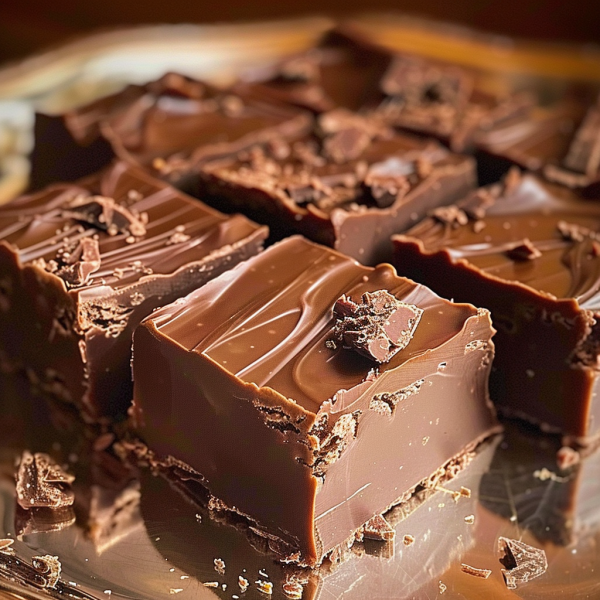
Old-fashioned chocolate fudge is a timeless dessert that has been cherished by generations. With its rich, velvety texture and deep chocolate flavor, it’s no wonder that this classic treat remains a favorite among chocolate lovers. Whether you’re looking to indulge in a sweet snack or need a special gift for a loved one, homemade chocolate fudge is the perfect choice. In this blog post, we’ll dive into the history of chocolate fudge, explore the step-by-step process of making it, and offer tips and variations to help you achieve the perfect batch every time.
The History of Chocolate Fudge
Chocolate fudge has a long and storied history that dates back to the late 19th century. The exact origins of fudge are somewhat murky, with several different stories circulating about its creation. Some believe that fudge was the result of a happy accident, while others think it was a deliberate attempt to create a new type of candy.
One popular theory is that fudge was invented by a college student who was trying to make caramel but “fudged” the recipe, resulting in the creation of a new, softer candy. The name “fudge” itself is thought to have come from this mistake. By the early 20th century, fudge had become a popular treat, especially in the United States, where it was sold at candy shops and fairs.
The Appeal of Old-Fashioned Chocolate Fudge
What makes old-fashioned chocolate fudge so special? Unlike modern versions that often use condensed milk or marshmallow fluff, old-fashioned fudge is made with just a few simple ingredients: sugar, butter, milk, and chocolate. The simplicity of the recipe allows the rich chocolate flavor to shine through, creating a treat that is both indulgent and satisfying.
Old-fashioned fudge is also known for its unique texture. When made correctly, it has a smooth, creamy consistency that melts in your mouth. Achieving this texture requires careful attention to the cooking process, as well as a bit of patience.
Ingredients for Old-Fashioned Chocolate Fudge
To make old-fashioned chocolate fudge, you’ll need the following ingredients:
- 2 cups white sugar
- 1/2 cup cocoa
- 1 cup milk
- 4 tablespoons butter
- 1 teaspoon vanilla extract
These ingredients are likely already in your pantry, making this recipe both convenient and budget-friendly.
Step-by-Step Guide to Making Old-Fashioned Chocolate Fudge
Making old-fashioned chocolate fudge is a straightforward process, but it does require precision and attention to detail. Follow these steps to ensure your fudge turns out perfectly every time:

1. Prepare Your Equipment
Before you begin, gather all your equipment. You’ll need a heavy-bottomed saucepan, a wooden spoon, a candy thermometer, and an 8-inch square baking dish. Line the baking dish with parchment paper or lightly grease it to prevent the fudge from sticking.
2. Combine the Ingredients
In your saucepan, combine the sugar, cocoa, and milk. Stir the mixture over medium heat until the sugar is fully dissolved. It’s important to stir constantly to prevent the mixture from scorching on the bottom of the pan.
3. Cook the Fudge
Once the sugar is dissolved, stop stirring and allow the mixture to come to a boil. Insert your candy thermometer into the mixture and continue to cook until it reaches the soft-ball stage, which is between 234°F and 240°F (112°C to 116°C). This stage is crucial for achieving the right texture, so be sure to keep a close eye on the thermometer.
4. Add Butter and Vanilla
Once the mixture reaches the soft-ball stage, remove it from the heat. Add the butter and vanilla extract, but do not stir. Allow the mixture to cool undisturbed until it reaches about 110°F (43°C).
5. Beat the Fudge
Once cooled, use a wooden spoon to beat the fudge until it thickens and loses its gloss. This process may take several minutes, and you’ll notice the mixture becoming more opaque and firm as you go.
6. Pour and Set
Quickly pour the fudge into your prepared baking dish, spreading it evenly with the back of a spoon. Allow it to cool completely at room temperature before cutting it into squares.
Tips for Perfect Old-Fashioned Chocolate Fudge
Making old-fashioned fudge can be a bit tricky, especially if you’re new to candy-making. Here are some tips to help you get it right:
1. Use a Candy Thermometer
A candy thermometer is essential for making fudge. It ensures that the mixture reaches the correct temperature for the soft-ball stage. Without it, you risk undercooking or overcooking the fudge, leading to a texture that is either too soft or too hard.
2. Stir with Care
While it’s important to stir the sugar and cocoa mixture at the beginning to dissolve the sugar, avoid stirring once it begins to boil. Stirring during the boiling process can cause the sugar to crystallize, resulting in a grainy texture.
3. Be Patient When Cooling
Allowing the fudge to cool undisturbed after adding the butter and vanilla is crucial. This cooling period helps to set the fudge and makes it easier to beat later. Rushing this step can lead to fudge that doesn’t set properly.
4. Beat Until Thickened
The beating process is what gives old-fashioned fudge its creamy texture. Be patient and continue to beat the mixture until it thickens and loses its shine. If you stop too soon, the fudge may not set correctly.
5. Store Properly
Once your fudge is made, store it in an airtight container at room temperature. It will keep for up to two weeks, although it’s unlikely to last that long!
Variations on Old-Fashioned Chocolate Fudge
While traditional chocolate fudge is delicious on its own, there are plenty of ways to customize the recipe to suit your taste. Here are some ideas for adding a unique twist to your fudge:
1. Nutty Fudge
For a bit of crunch, stir in chopped nuts like walnuts, pecans, or almonds during the beating stage. Nuts add texture and a nutty flavor that complements the richness of the chocolate.
2. Chocolate Mint Fudge
Add a teaspoon of peppermint extract along with the vanilla for a refreshing mint flavor. This variation is perfect for the holidays and pairs well with a cup of hot cocoa.
3. Rocky Road Fudge
Fold in mini marshmallows and chopped nuts just before pouring the fudge into the baking dish. This classic combination adds a fun, chewy texture to the smooth fudge.
4. Sea Salt Chocolate Fudge
Sprinkle a pinch of flaky sea salt on top of the fudge before it sets. The salty-sweet contrast enhances the chocolate flavor and adds a gourmet touch to your homemade fudge.
5. Dark Chocolate Fudge
For a deeper, more intense chocolate flavor, use dark cocoa powder instead of regular cocoa. You can also experiment with bittersweet or semisweet chocolate for a more complex taste.
Troubleshooting Common Fudge Problems
Even experienced candy-makers can run into issues when making fudge. Here are some common problems and how to fix them:
1. Grainy Fudge
If your fudge turns out grainy, it’s likely due to sugar crystals forming during the cooking process. To prevent this, make sure the sugar is fully dissolved before the mixture comes to a boil, and avoid stirring once it starts boiling. Using a candy thermometer can also help ensure the mixture reaches the right temperature.
2. Fudge Didn’t Set
If your fudge doesn’t set, it may not have reached the soft-ball stage during cooking, or you may have stopped beating it too soon. You can try reheating the mixture and bringing it back to the correct temperature, then cooling and beating it again.
3. Fudge is Too Hard
Fudge that’s too hard was likely overcooked. Be sure to remove the mixture from the heat as soon as it reaches the soft-ball stage. If your fudge is hard, try adding a tablespoon of water and re-cooking it to soften it up.
The Science Behind Fudge: Understanding Sugar Crystals
Fudge-making is as much a science as it is an art. The key to perfect fudge lies in the formation of sugar crystals. When sugar is heated in the presence of liquid, it dissolves and creates a syrup. As the syrup cools, sugar crystals begin to form.
The size of these crystals determines the texture of the fudge. Large crystals make the fudge grainy, while small crystals create a smooth, creamy texture. By controlling the temperature and agitation during the cooking and cooling process, you can influence the size of the sugar crystals and achieve the desired texture.
Using a candy thermometer helps ensure the sugar reaches the right temperature for forming small crystals. The beating process, where the mixture is stirred as it cools, breaks up larger crystals and encourages the formation of smaller ones. This results in the smooth, melt-in-your-mouth texture that makes fudge so irresistible.
Serving Suggestions: Enjoying Your Old-Fashioned Chocolate Fudge
Old-fashioned chocolate fudge is a versatile treat that can be enjoyed in many different ways. Here are some serving suggestions to make the most of your homemade fudge:
1. Pair with Ice Cream
For an indulgent dessert, serve your fudge alongside a scoop of vanilla or chocolate ice cream. The combination of cold, creamy ice cream and rich, chocolatey fudge is a match made in heaven.
2. Create Fudge Brownies
Add chunks of your homemade fudge to brownie batter before baking. The fudge will melt slightly, creating pockets of gooey chocolate throughout the brownies.
3. Fudge-Topped Cupcakes
Top cupcakes with small squares of fudge instead of frosting. The fudge adds a decadent touch and a burst of chocolate flavor to each bite.
4. Fudge Gift Boxes
Wrap individual squares of fudge in wax paper and place them in a decorative box or tin. Homemade fudge makes a thoughtful gift for holidays, birthdays, or any special occasion.
5. Fudge Fondue
Melt the fudge in a double boiler and use it as a dip for fruit, marshmallows, or pretzels. This is a fun and interactive way to enjoy fudge with friends and family.
Why Old-Fashioned Fudge is the Ultimate Homemade Treat
In a world where convenience often trumps quality, taking the time to make old-fashioned chocolate fudge from scratch is a rewarding experience. Not only does it allow you to control the ingredients and avoid preservatives, but it also connects you to a long tradition of candy-making that spans generations.
Making fudge is more than just cooking; it’s an act of creativity and love. Whether you’re making it for yourself, to share with loved ones, or to give as a gift, homemade fudge is a sweet reminder of simpler times and the joys of homemade treats.
Conclusion
Old-fashioned chocolate fudge is a classic dessert that never goes out of style. With its rich flavor and creamy texture, it’s a treat that everyone can enjoy. By following the tips and variations in this guide, you’ll be able to create the perfect batch of fudge every time. Whether you’re a seasoned candy-maker or a beginner, the satisfaction of making your own fudge is well worth the effort. So why not give it a try? Your taste buds will thank you.
More
Chocolate Raspberry Cake
Print
Old-Fashioned Chocolate Fudge: A Classic Sweet Treat
Description
Old-fashioned chocolate fudge is a timeless dessert that has been cherished by generations. With its rich, velvety texture and deep chocolate flavor, it’s no wonder that this classic treat remains a favorite among chocolate lovers. Whether you’re looking to indulge in a sweet snack or need a special gift for a loved one, homemade chocolate fudge is the perfect choice. In this blog post, we’ll dive into the history of chocolate fudge, explore the step-by-step process of making it, and offer tips and variations to help you achieve the perfect batch every time.
Ingredients
- 2 cups white sugar
- 1/2 cup cocoa
- 1 cup milk
- 4 tablespoons butter
- 1 teaspoon vanilla extract
Instructions
1. Prepare Your Equipment
Before you begin, gather all your equipment. You’ll need a heavy-bottomed saucepan, a wooden spoon, a candy thermometer, and an 8-inch square baking dish. Line the baking dish with parchment paper or lightly grease it to prevent the fudge from sticking.
2. Combine the Ingredients
In your saucepan, combine the sugar, cocoa, and milk. Stir the mixture over medium heat until the sugar is fully dissolved. It’s important to stir constantly to prevent the mixture from scorching on the bottom of the pan.
3. Cook the Fudge
Once the sugar is dissolved, stop stirring and allow the mixture to come to a boil. Insert your candy thermometer into the mixture and continue to cook until it reaches the soft-ball stage, which is between 234°F and 240°F (112°C to 116°C). This stage is crucial for achieving the right texture, so be sure to keep a close eye on the thermometer.
4. Add Butter and Vanilla
Once the mixture reaches the soft-ball stage, remove it from the heat. Add the butter and vanilla extract, but do not stir. Allow the mixture to cool undisturbed until it reaches about 110°F (43°C).
5. Beat the Fudge
Once cooled, use a wooden spoon to beat the fudge until it thickens and loses its gloss. This process may take several minutes, and you’ll notice the mixture becoming more opaque and firm as you go.
6. Pour and Set
Quickly pour the fudge into your prepared baking dish, spreading it evenly with the back of a spoon. Allow it to cool completely at room temperature before cutting it into squares.
Tips for Perfect Old-Fashioned Chocolate Fudge
Making old-fashioned fudge can be a bit tricky, especially if you’re new to candy-making. Here are some tips to help you get it right:
1. Use a Candy Thermometer
A candy thermometer is essential for making fudge. It ensures that the mixture reaches the correct temperature for the soft-ball stage. Without it, you risk undercooking or overcooking the fudge, leading to a texture that is either too soft or too hard.
2. Stir with Care
While it’s important to stir the sugar and cocoa mixture at the beginning to dissolve the sugar, avoid stirring once it begins to boil. Stirring during the boiling process can cause the sugar to crystallize, resulting in a grainy texture.
3. Be Patient When Cooling
Allowing the fudge to cool undisturbed after adding the butter and vanilla is crucial. This cooling period helps to set the fudge and makes it easier to beat later. Rushing this step can lead to fudge that doesn’t set properly.
4. Beat Until Thickened
The beating process is what gives old-fashioned fudge its creamy texture. Be patient and continue to beat the mixture until it thickens and loses its shine. If you stop too soon, the fudge may not set correctly.
5. Store Properly
Once your fudge is made, store it in an airtight container at room temperature. It will keep for up to two weeks, although it’s unlikely to last that long!

